Geek Articles
Disassembly of the Canon RF 50mm f1.2L
It is the best of lenses, it is the worst of lenses, it is the lens of perfection, it is the lens of complexity, it is the lens of new technology, it may be the lens of non-repairability.
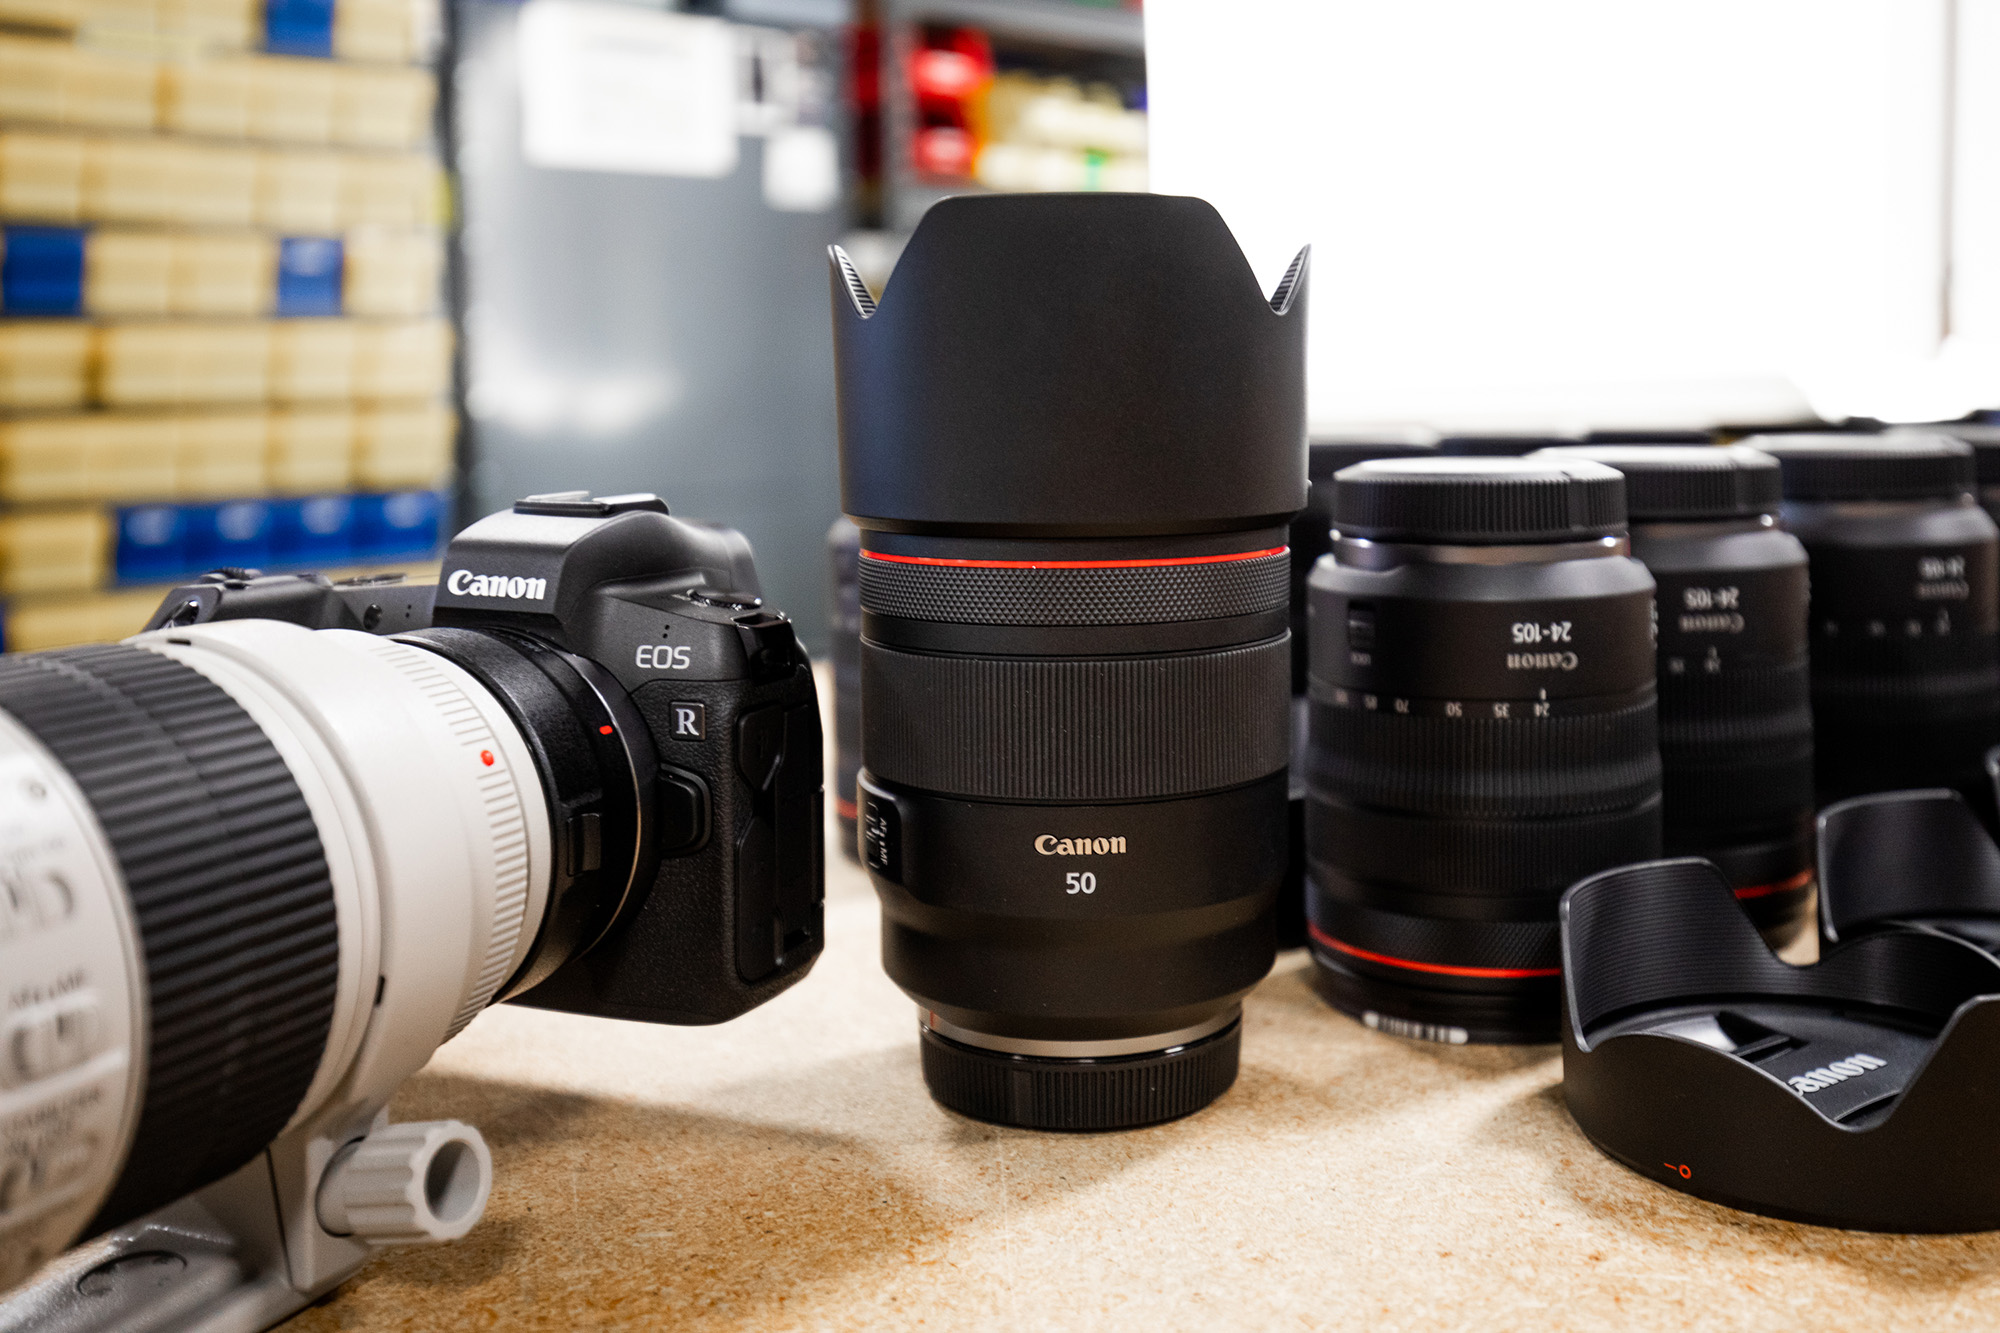
A little while ago, Canon released the computer generated MTF charts for the Canon RF 50mm f/1.2 lens. Despite my ambivalence about the Canon EOS-R camera, this lens, and this lens alone, made me lust after the system. (For those of you keeping score, I have managed to go almost 3 months now without buying into any mirrorless system. I am very proud of myself.)
So when we got them in stock I managed to get one shuttled over to the repair department so we could take a look inside – as long as we promised to have it back working fine and ready to rent in a couple of hours. We’ve done this a hundred times or more so we weren’t worried about it. (Narrator: “But they should have been worried about it.”)
Usually, I start tear down posts with a joke about ‘those of you who are following along by disassembling your own lens at home’. Well, no joke today; this is not a home disassembly project. I’m not really sure it’s even a Lensrentals disassembly project. But we got out tools out and boldly went where we probably shouldn’t have gone.
Lensrentals.com, 2018
Starting with a False Start
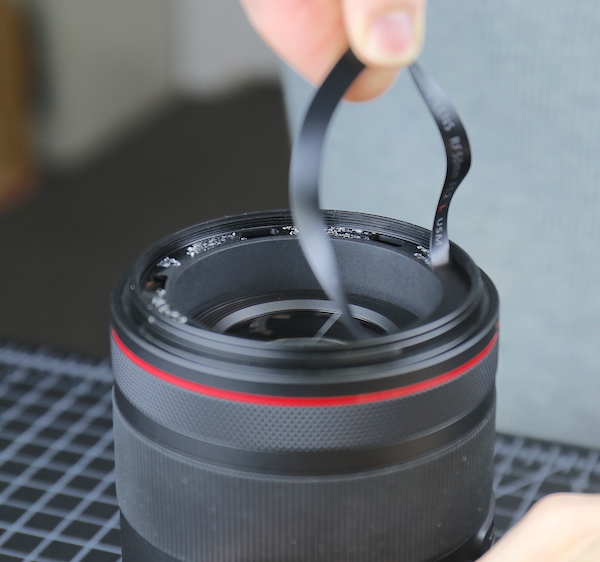
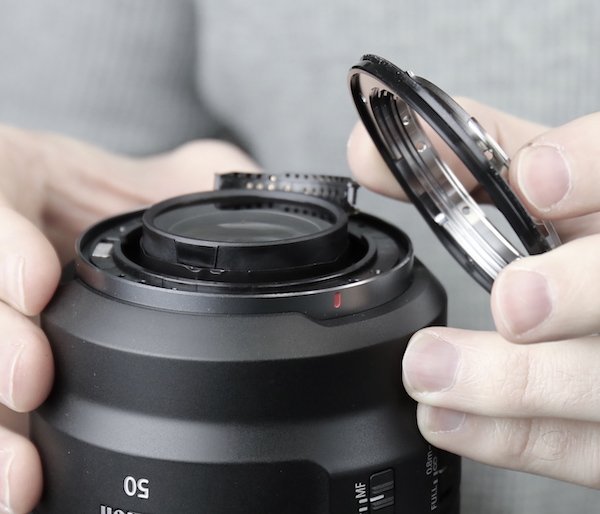
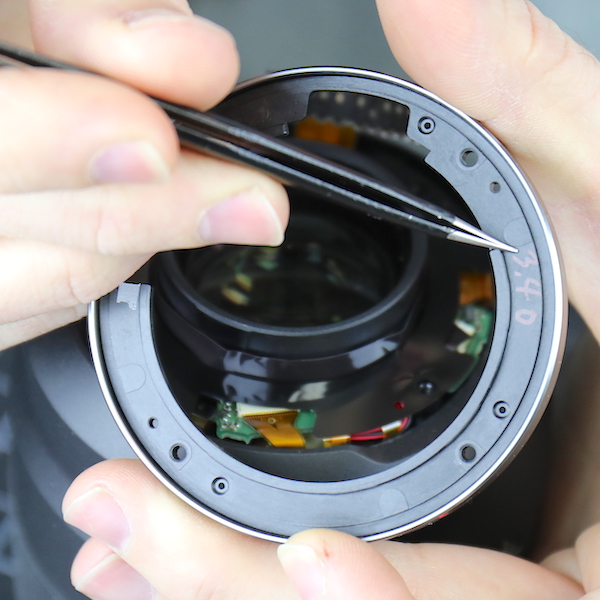
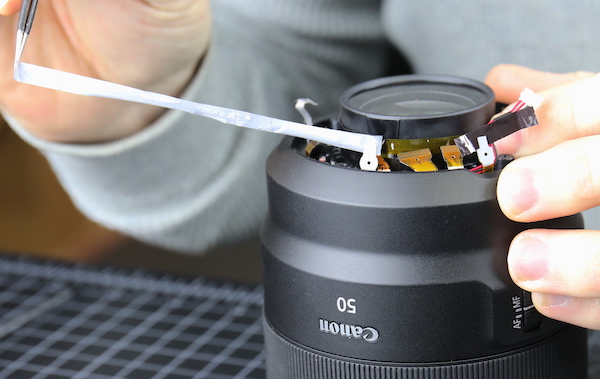
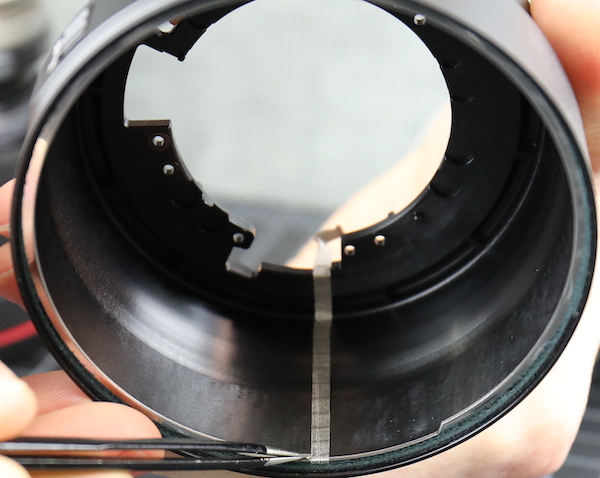
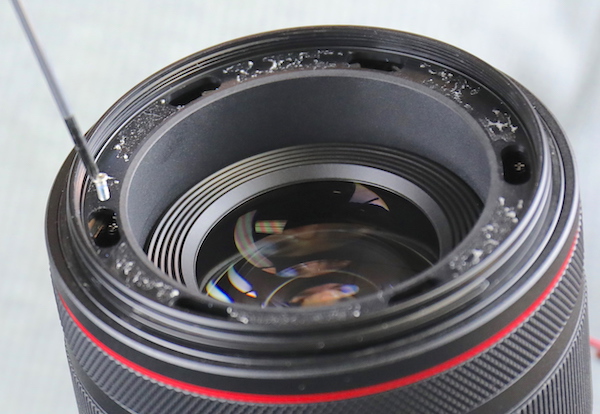
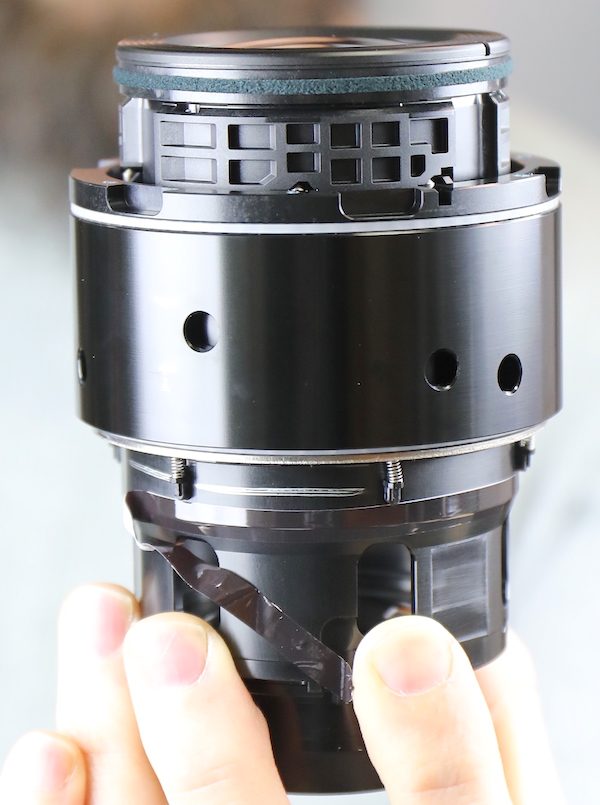
Aaron decided this lens looked like it would best be opened from the front, so the makeup ring came off.
Lensrentals.com, 2018
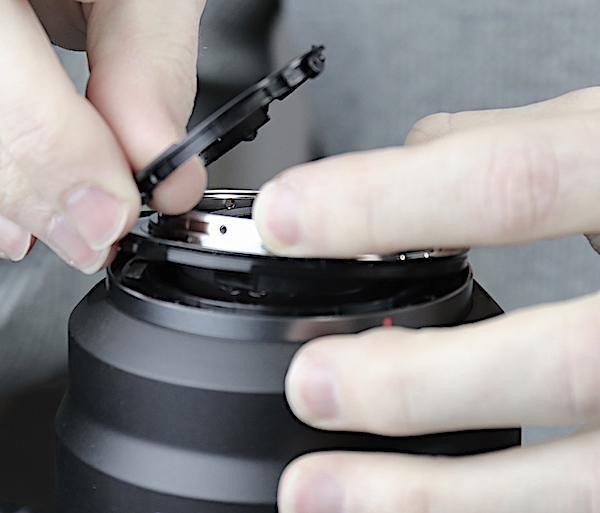
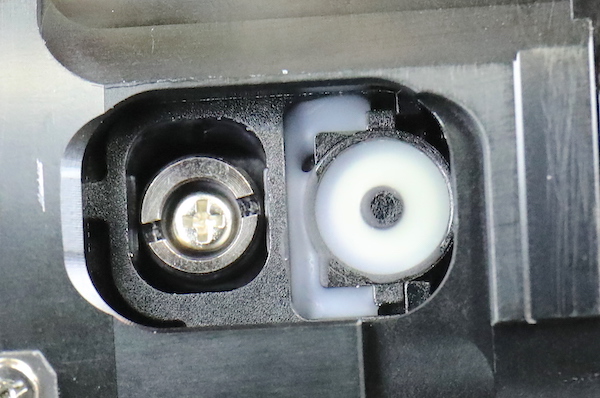
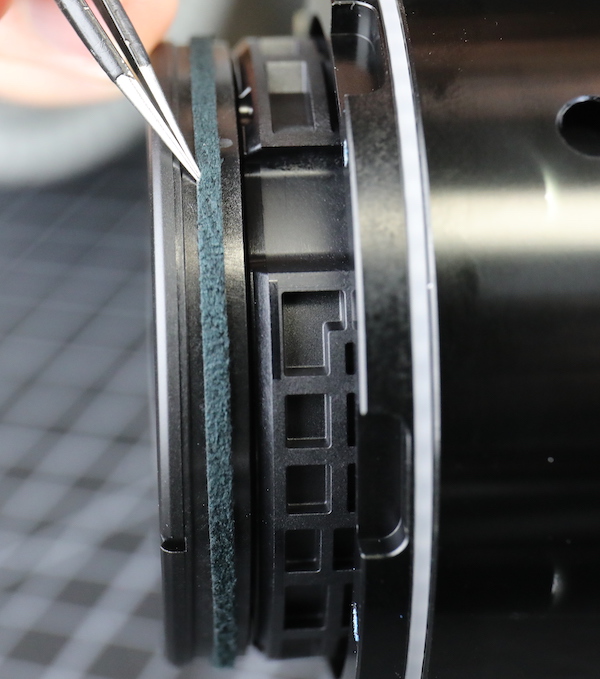
Which let us see a very odd screw arrangement in the front, with multiple screws off-center from the slots and angled through some plastic wedges. I’ll be honest, we had never seen an arrangement quite like this before but we figured it was some kind of binary code for ‘Do Not Enter’, so we didn’t enter.

Lensrentals.com, 2018
We beat a hasty retreat, flipped that thing over, and started disassembling from the back. Things looked fairly routine back here, except that Canon used some side screws to hold the rear baffle in place (many other manufacturers do that, but Canon usually has a snap-in rear baffle). We’ll fondly look back on this part of the disassembly, when things looked fairly routine. Good times.
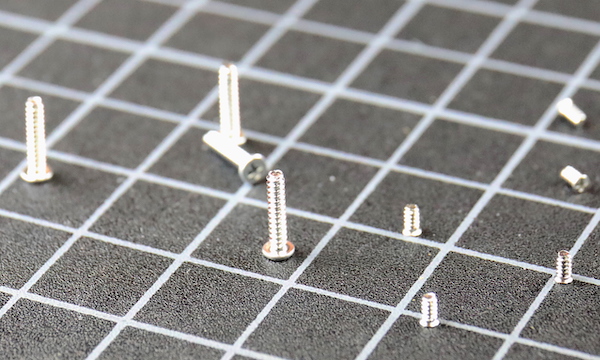
Anyway, a few screw removals and the rear baffle comes out. Then we remove a set of nice, heavy-duty screws to remove the bayonet mount.
Lensrentals.com, 2018
Lensrentals.com, 2018
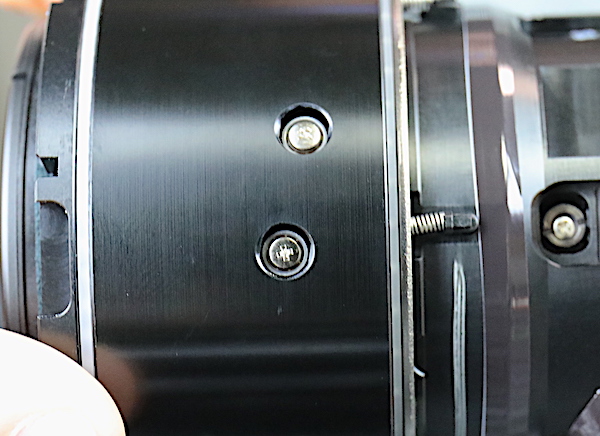
The smaller screws in the image below are the ones attaching the electronic connector and baffle to the bayonet mount, the larger screws attach the bayonet to the lens. As always with Canon lenses, there’s that feeling that strength is engineered in: larger and longer screws; and plenty of them.
Lensrentals.com, 2018
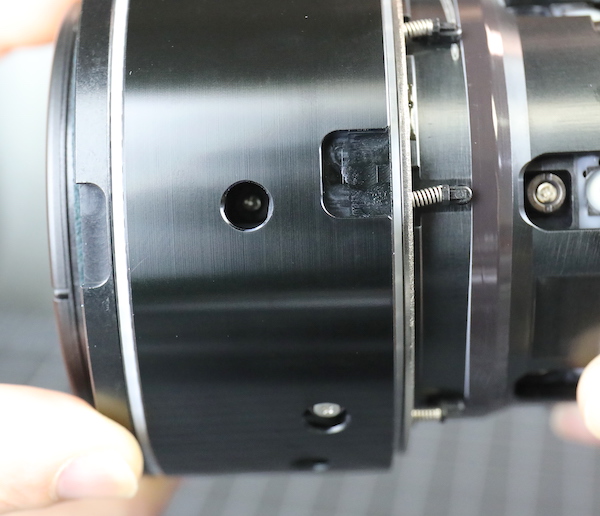
Something we haven’t seen often in Canon lenses, there’s a grounding or heat transfer tape coming from inside the lens back to the bayonet mount.
Lensrentals.com, 2018
After lifting the tape up, we can remove the rear spacer.
Lensrentals.com, 2018
The spacer is labeled for thickness so different spacer thickness is probably used instead of shimming for infinity focus. Again, this is a fairly routine Canon method.
Lensrentals.com, 2018
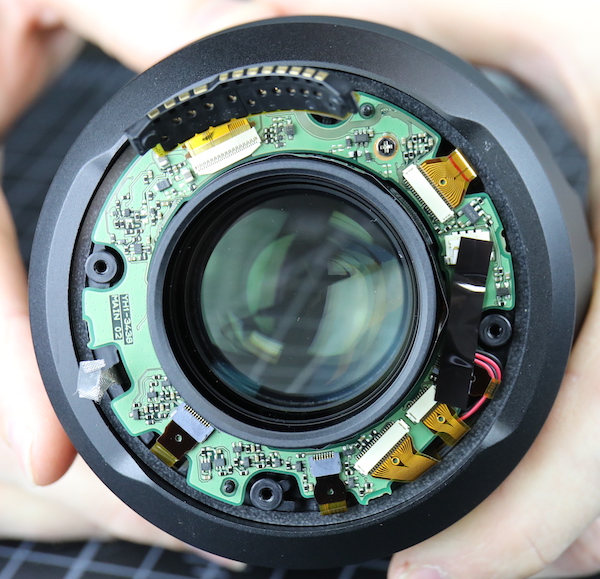
Something else we don’t usually see in Canon lenses, there’s some electrical shielding above the PCB. Whether this is because the RF lens mount is closer to the sensor or because of the additional electronics, or both, I don’t know.
Lensrentals.com, 2018
Looking at the PCB does seem to confirm that there are more electrons running around in this lens, though. The board is pretty densely packed, there’s a lot of flex connectors, and Holy Nikon, Batman, there’s some wires going into the PCB!!!!! Since Canon strongly prefers flex connections, we assume there’s more current going through here than the legacy Canon lenses we’re used to. (It could also be to lower resistance over a longer wiring run.)
Lensrentals.com, 2018
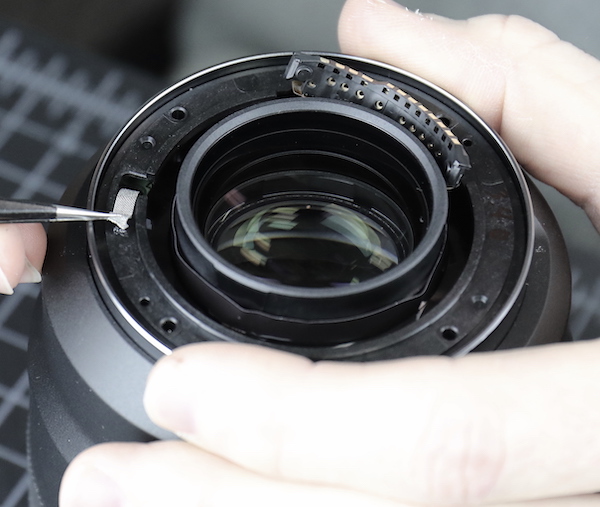
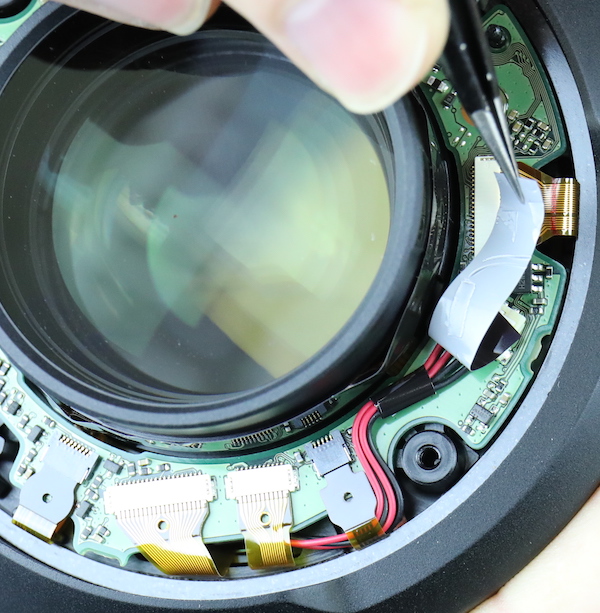
Pulling up the piece of tape shows that the wires are going into a plug, not soldered to the PCB, which makes us happier because soldering and desoldering is time-consuming. And you can burn your fingers and such.
Lensrentals.com, 2018
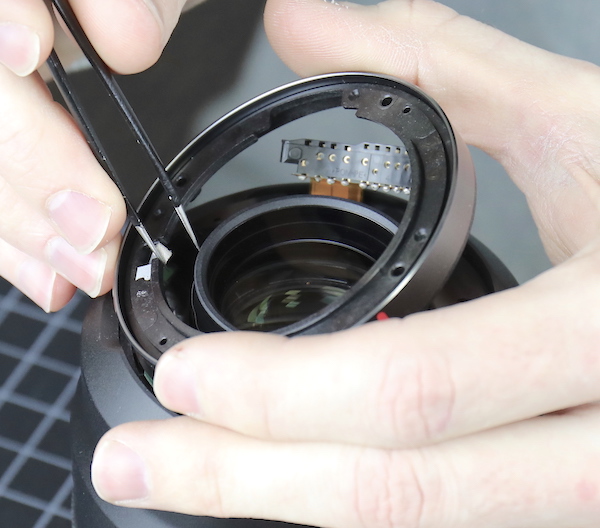
After disconnecting all the flexes, the PCB comes out in the usual fashion. Then there’s a little twist we see every so often – one flex wraps around the rear inner barrel and is stuck down with tape. The PCB area is packed tight and this flex has gone around to pass down on the far side along the barrel.
Lensrentals.com, 2018
There’s also a nice weather seal ring inside here (although given it’s location, probably more about dust than moisture). I should mention that we saw good foam at each of the barrel joints and the usual rubber seal under the bayonet mount.
Lensrentals.com, 2018
One more set of screws is removed and then the rear outer barrel can slide off.
Lensrentals.com, 2018
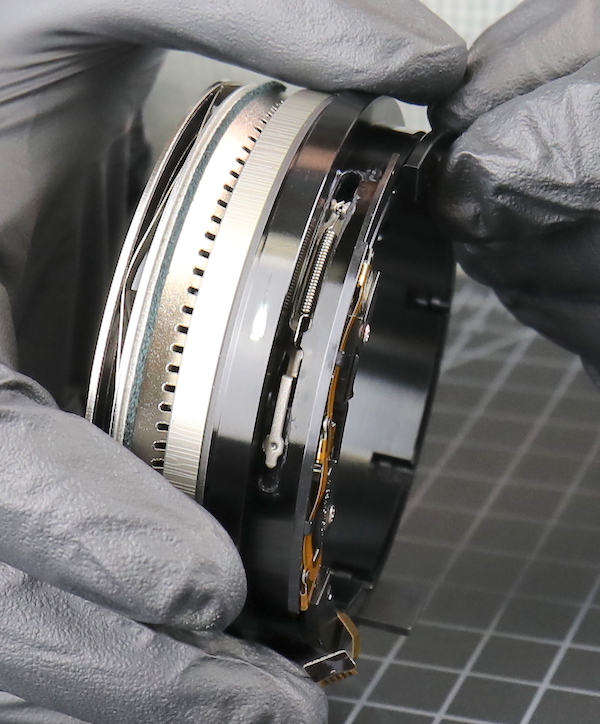
Underneath is the large version of Canon’s ring USM motor (this is the same motor that is in the new Canon 400mm f/2.8 IS III – hint for those of you wondering what the next tear down will be). The Canon RF 50mm f/1.2 is said to be a quick focusing lens. Given the amount of glass that moves with focusing (we’ll get to that in a minute) a big motor is probably necessary. There’s an interesting tensioning spring on the side of the motor, something we’ve not seen before. At this point, we have no idea what it is for but assume we’ll figure it out later. (Narrator: “But they would not figure it out later.”)
Lensrentals.com, 2018
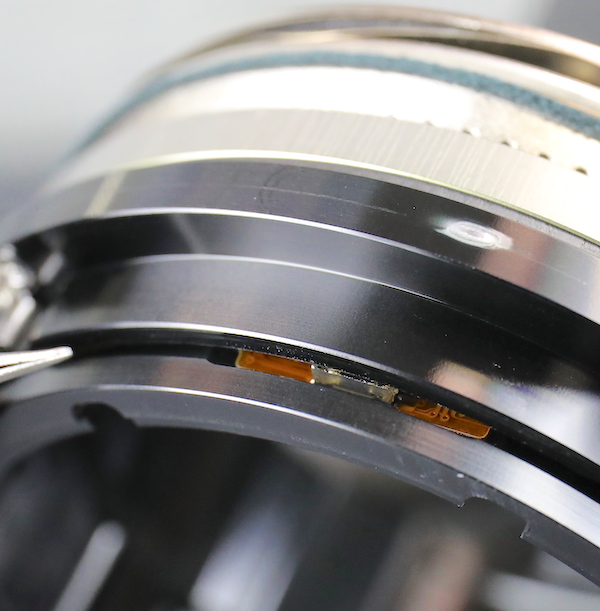
Inside the rear barrel that electrical connecting tape that we took off of the PCB comes to an end. It doesn’t have an obvious connection or sit on top of any obvious electronics within the lens, so our best guess is it’s for static discharge. Or perhaps it’s decorative. I’d love to think of a bunch of Canon engineers, sitting around drinking sake, and one goes ‘Hey, we’ve got lots of electrical discharge tape. Let’s put a piece in the rear barrel that goes nowhere. Roger and Aaron will take it apart and have no idea what it’s for’. Mission accomplished, Canonista.
Lensrentals.com, 2018
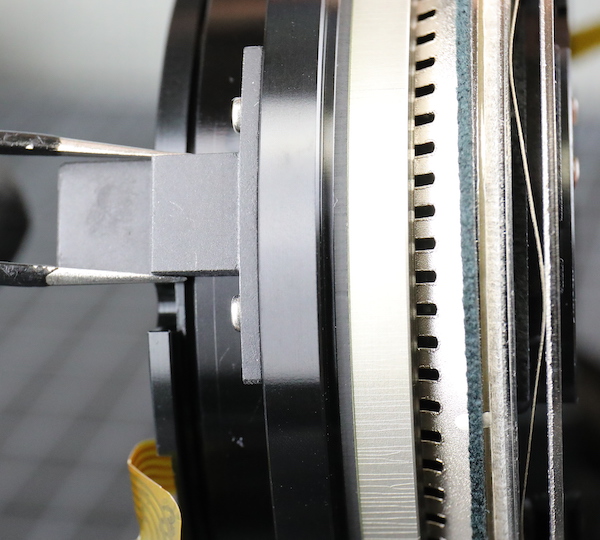
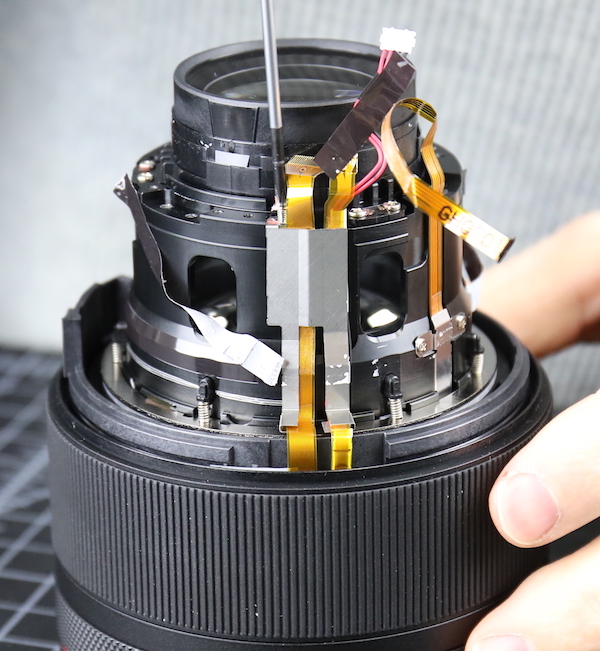
Here’s another view of the lens. Notice there is more sealing felt between the motor and outer barrel (red line). You can see a multi-flex connector on the left, and in the slot of the focus ring assembly, some position sensors are barely visible (green line).

Lensrentals.com, 2018
Another set of 6 screws holds the focus motor assembly in place. After removing those the assembly comes right off. Because someone will ask, gloves are needed to keep finger oils off certain electronics. They aren’t needed for taking off barrels and such.
Lensrentals.com, 2018
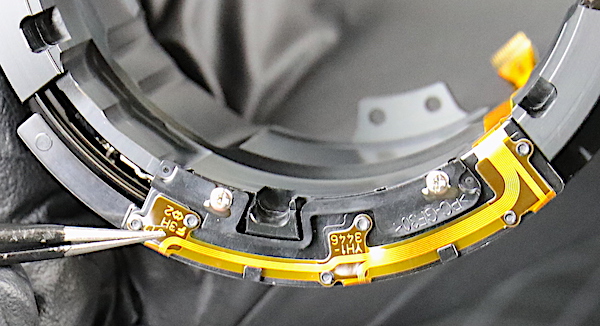
Underneath the flex enlargements are a couple of the focus ring position sensors. In case anyone is not aware, this is a focus-by-wire lens, but these days that’s at least (and perhaps more) accurate than mechanical focus. This isn’t your grandfather’s electronic focus.
Lensrentals.com, 2018
There are more absolute position/position change sensors within the focus assembly. We put off disassembling the focus motor assembly since we had promised this lens back in a couple of hours. (Narrator: “Yeah, you got it. They did not come back to disassemble the focus motor.”)
Lensrentals.com, 2018
At the bottom of the assembly is a very large, robust focusing key.
Lensrentals.com, 2018
This inserts into a slot in the mid barrel. The focus motor moves the key, which moves the slot, which turns the focusing barrel to adjust focus.
Lensrentals.com, 2018
Let’s take a look at the remaining lens core, now that we have the AF motor assembly off. You can see the rear group sitting on top. (They’re out of focus, but you can see one of the pairs of screws that attach it to the lens.) Then there are slots in the barrel with lots of air inside there. If you look through the slots, you can see the back of the focusing group down at the bottom. In other focus positions, this group slides back into the air, closer to the rear element.
Lensrentals.com, 2018
One other new thing: you can see a number of springs attached to the inner barrel and disappearing into the front barrel. At this point, we have no idea what those are doing. Our usual thought in this situation is that they’re holding tension on a plate containing a zillion ball bearings just waiting for their chance to escape.
One more look at just how empty most of the lens is when the focusing group is moved forward.
Lensrentals.com, 2018
For orientation purposes, let’s take a look at the lens diagram. Over on the right side, you can see the 4 elements making up that rear group bolted on the back of the lens. Everything else, all the elements on the left side of the diagram, move when focusing. So now we see why, since Canon wanted fast focusing, they slapped the big-boy USM motor in this lens. That’s a lot of glass to move around.
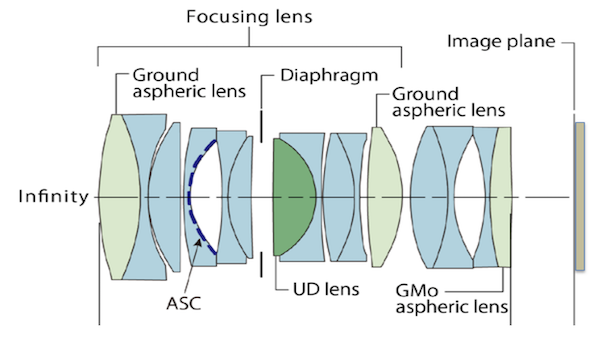
Courtesy, Canon USA
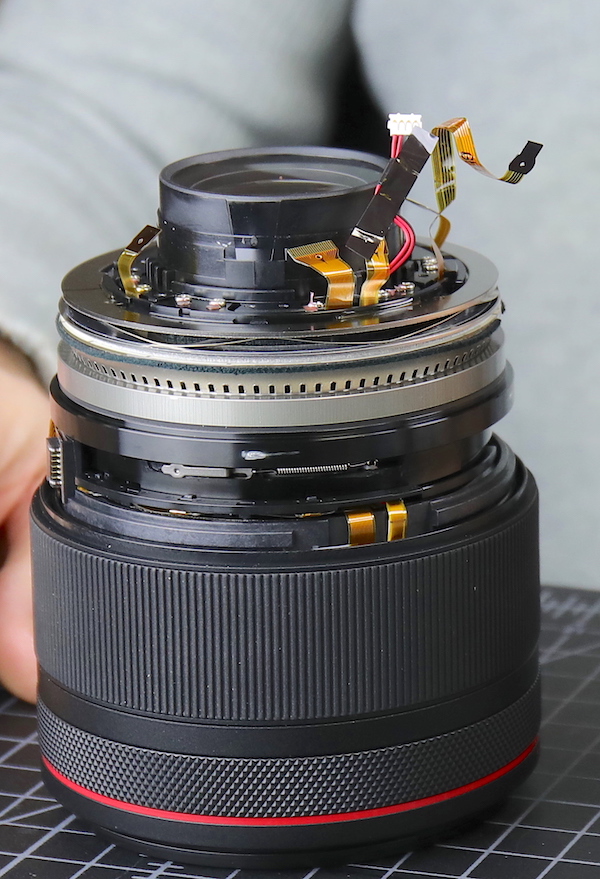
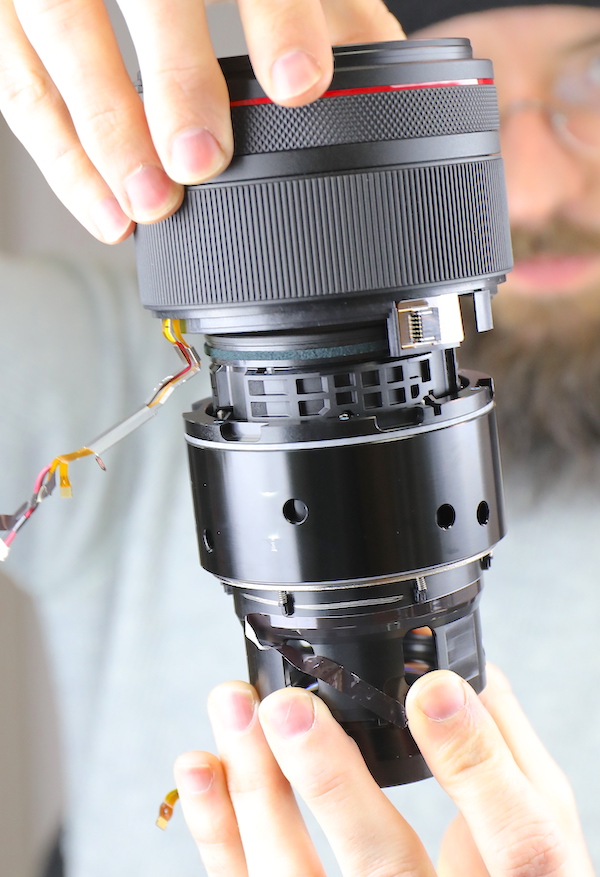
Once we’d gotten to this point, we were starting to feel a little lost with the Canon RF 50mm f/1.2L. Things were vaguely familiar, but not quite like any other Canon lens we’d taken apart before.
Looking at the other side of the inner barrel, we get another look at the Springs of Unknown Purpose, the Shielded Flexes of Forevermore, the Borrowed Wires of Nikon, and another Ring-Around-the-Barrel Tape (already pulled back in the image).
Lensrentals.com, 2018
Lensrentals.com, 2018
With the flexes out of the way, let’s move that big front focusing group down into the air space where we can see it. One thing we were impressed with is how much movement occurs. A long focusing throw like this should mean very accurate focusing.
Lensrentals.com, 2018
The second thing to note is there are some really robust eccentric adjustment collars in the back of this group. As Canon does these days, they adjust them at the factory and then put silicone glue in place to make sure they don’t move. Or, if you want to adjust them yourselves, make sure it’s a pain to get the silicone glue out before doing the adjustment. If you look back up at the lens diagram, though, you’ll see this adjustment is for the group containing a ground aspheric element. Those are very delicate to adjust; I can understand why Canon doesn’t want it touched.
Lensrentals.com, 2018
There are 6 eccentrics at this level, three for tilt, three for centering. Each eccentric is paired with a white nylon post as you see above.
It probably works in this way: the post holds the lens group in place but has some play that the eccentric is used to fine tune, then the glue is applied. Until we unglue one and learn how to make the adjustments ourselves that’s just an educated guess, though, and that task will wait for another day. The takeaway, though, is Canon continues to have more potential optical corrections than almost anyone, and they’re making the adjustment mechanisms both more accurate and more robust.
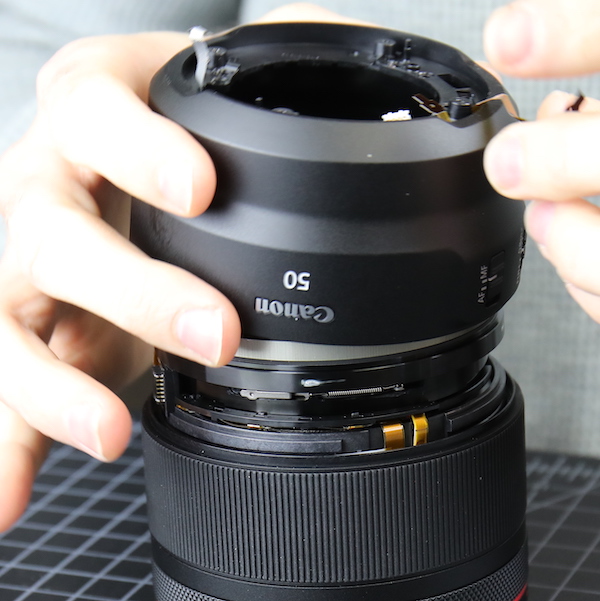
At this point, we had decided that today was not the day to pull out the glue and learn eccentric adjustments. Removing the rear group really wouldn’t reveal any new information. So we took another look at the front ring (Remember, the front? That’s where we started this.).
We could now look from the back and tell which screws would remove the front barrel. How is this done, you ask? It’s pretty simple; you turn a screw in the front, look at what’s coming out of the back, and go ‘no, not that one’ half-a-dozen times.
Lensrentals.com, 2018
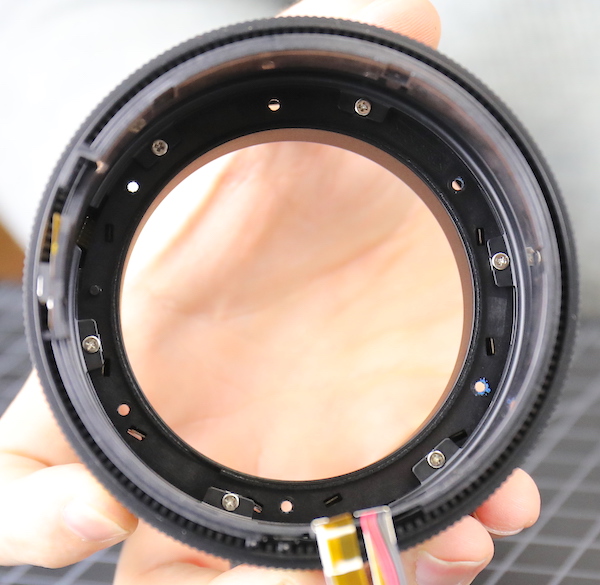
Finally, we removed the six long screws that let us slide the front barrel off.
Lensrentals.com, 2018
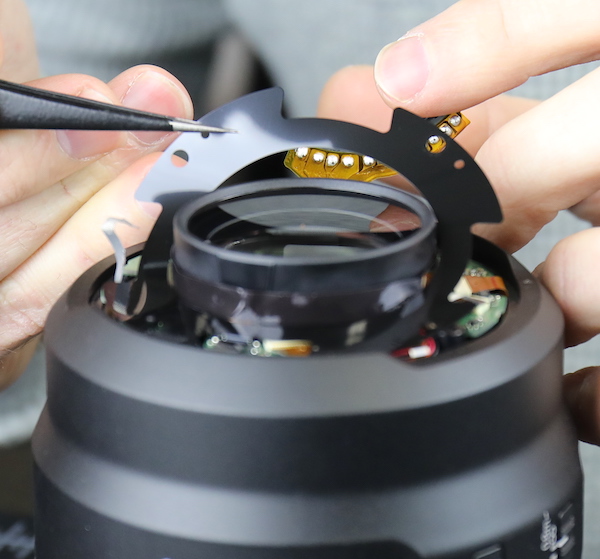
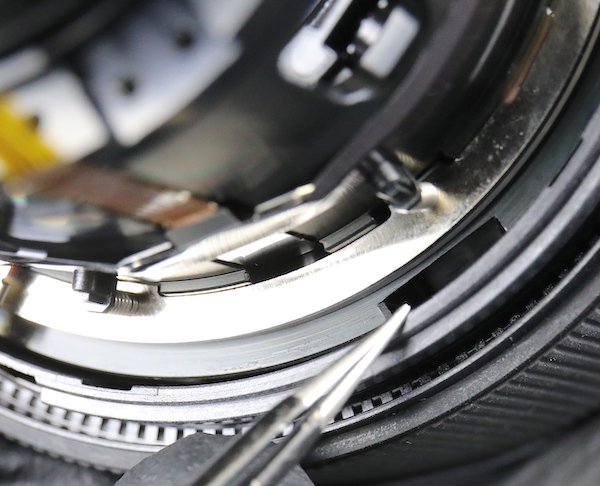
Inside the front barrel, you can see several things. First, the Flexes of Forevermore are traveling up inside the front barrel between inner and outer plastic rings. That makes sense, if the Control Ring can control almost anything, it has to be connected to almost everything. The Control Ring is a feature I really like in the short time I’ve used RF lenses. I hadn’t really thought about how much engineering goes into it. I had thought this feature might be a ‘trial balloon’ of sorts, but I’m now realizing this was a huge engineering commitment on the part of Canon.
Lensrentals.com, 2018
You can see in the image above that we can now see the underside screws that would let us disassemble this ring further. There will obviously be a bunch of position sensors underneath there, but we’d already answered one of our big questions: can we replace the filter ring (a part that breaks fairly frequently) easily? It looks like the answer is no, and that makes us sad; replacing the filter ring will mean a major disassembly (if the filter ring is sold as a part) or replacing the entire front barrel assembly (which may be the case). Either way, it’s not the quick and inexpensive repair we would hope for.
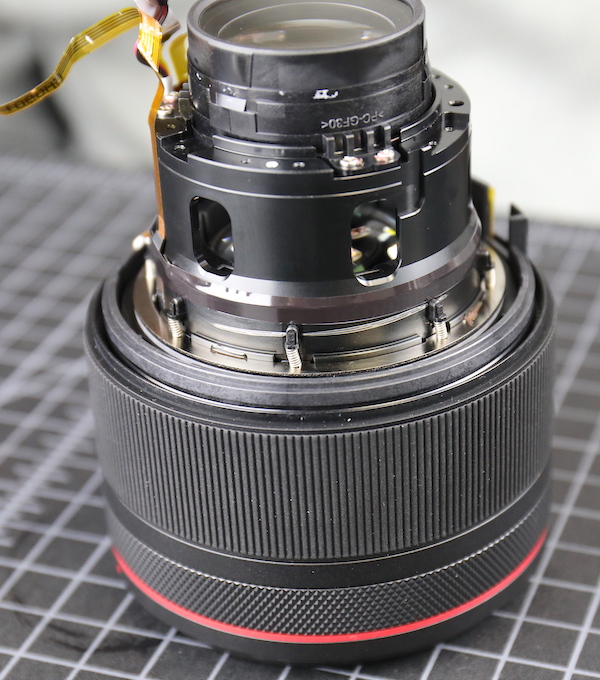
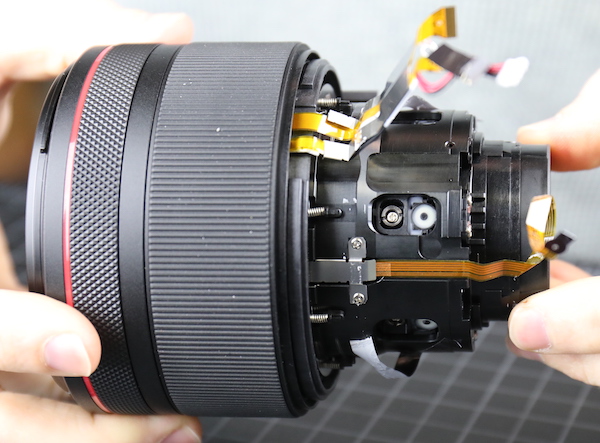
With all the outer barrels and electronics removed, we now come to the pure core of optical goodness that is the Canon RF 50mm f/1.2 L lens. Like a shaved cat, it’s always kind of shocking how small the core of the thing is.
Lensrentals.com, 2018
As we’ve seen throughout this lens, there is another thick foam weather resistant gasket around the front element.
Lensrentals.com, 2018
Time pressures (and fear, there was also fear involved) kept us from disassembling the inner focusing barrel, but there were a couple of interesting things to see. The barrel itself moves on paired rollers, which you can see to some degree in the out-of-focus image below. Note also the springs and the white bands or collars around the focusing ring, front, and back. There appear to be sets of small ball bearings under each band with the springs supplying tension across them to give a smooth resistance and nice feel to the focusing ring. It’s complex, but I will say the focusing throw is as smooth as could be, so apparently, it works well.
Lensrentals.com, 2018
And there is another set of eccentric adjustment collars way down deep (you can just barely see the screw head, you can’t make out the collar). So we have adjustable groups on both sides of the aperture, as expected in a Canon lens.
Lensrentals.com, 2018
So, What Did We Learn Today?
I wish we had enough time (and the guts) to disassemble further into the front internal and external rings, but we weren’t pushing our luck today. We already suffer from PBBA-SD (Post Ball Bearing Accident Stress Disorder) and have experienced a couple of episodes of TSAKI (touched sensor and killed it), so we’re a little nervous about going further in this lens. At the time of this disassembly, it was not replaceable. We’ll have to come back and do that at a later time; when it might be relatively OK if we mess a lens up.
What we did see, though, is the R lenses are not only entirely new optics, they are also largely new electrical and mechanical systems. There are a lot of different things in here that we haven’t seen in any Canon EF lenses. Some of them we should have expected, like the increased electronics going to the control ring. Others we don’t really understand yet, like the tension spring in the ring USM motor or the increased electrical shielding.
Some days we show off our amazing disassembly skills doing tear-downs. Some days, we get overconfident, decide we can do anything in two hours, look inside, get overwhelmed, and beat a fairly hasty retreat. This was one of those latter days. We’ll be back on a day when there are plenty in stock and we can set aside 4 or 5 hours to explore.
In the meantime, we’ll have to settle for seeing the same ‘best in field’ optical adjustability we expect in Canon lenses. We also saw lots of new stuff we don’t completely understand yet and a level of complexity we weren’t expecting. Complexity and our lack of familiarity with the lens make things seem a bit more chaotic than they really are, but certainly, this isn’t quite as modular as most new Canon lenses are.
But one thing that is very clear: the RF lenses contain some new technology they haven’t used before. There’s a lot of engineering that’s gone into these. Things are different inside here. As we’ll see in the next teardown we do, some of that is carrying over to at least some EF lenses. What does this mean? It means Canon has invested very heavily into developing the lenses of the R system. This level of engineering didn’t all happen in the last year, they’ve been working on this for quite a while.
They step back so that they may leap further. African proverb
Submitted most humbly by
Roger Cicala and Aaron Closz
Lensrentals.com
December, 2018
Author: Roger Cicala
I’m Roger and I am the founder of Lensrentals.com. Hailed as one of the optic nerds here, I enjoy shooting collimated light through 30X microscope objectives in my spare time. When I do take real pictures I like using something different: a Medium format, or Pentax K1, or a Sony RX1R.
-
j fortunato
-
Jeff Allen
-
rocketride
