Equipment
Guest Blogger Aaron Nace | How to Capture the Real & Surreal with a Superlative Lens
Today’s Guest Blogger Aaron Nace is going to show you tips on creating and compositing fantastical images with a lens he considers to be one of the best.
Aaron is a Chicago-based photographer and retoucher who combines elements of reality and fantasy to create his images. Aaron has taught Photoshop and photography to over 100,000 people, and his images have been viewed over 15 million times on Flickr alone.
He is also the founder and president of Phlearn.com, which offers daily videos, advanced tutorials, featured photographers and more. Aaron is one creative, hard-working guy, and we’re thankful he has the time to show you guys some of the magic behind his work!

The Canon 16-35mm f/2.8L II is what I call a “superlative lens.” It is very different from anything you can get from a point-and-shoot or an iPhone. It is at an extreme, and the images that it produces reflect that extreme, bringing the viewer into another world.

“Superlative” lenses really have to stretch the extremes, so not many lenses fit in this category. The Canon 85mm f/1.2L II is a superlative in that it allows you to photograph with an extremely shallow depth of field. Anything longer than 200mm at f/2.8 I would also consider superlative, as it compresses an image far more than the human eye does. Using one of these superlative lenses will make your photography stand out.
Include More
Using the 16-35 on a full-frame body like the Canon EOS 5D Mark III will allow you to get extremely close to your subject while also capturing the entire environment. If you are shooting in an amazing environment this is a plus. If your location leaves a lot to be desired, you may choose to shoot at a longer focal length in order to crop some of it out. Sometimes your environment may not be great on its own but can be enhanced with lighting. In this example you can see how the original photo includes too much.
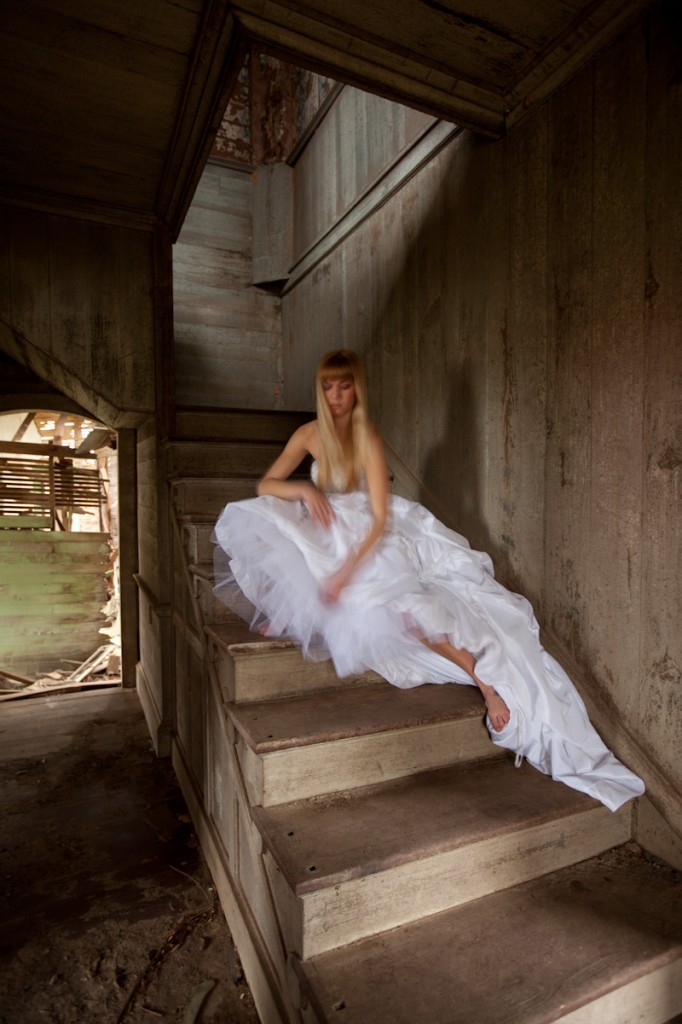
The back door is in view, and light is spilling into the scene from many directions. Instead of trying to change the environment physically, you can alter its appearance with light. Also a slight change of camera angle will avoid distracting elements like the back door.
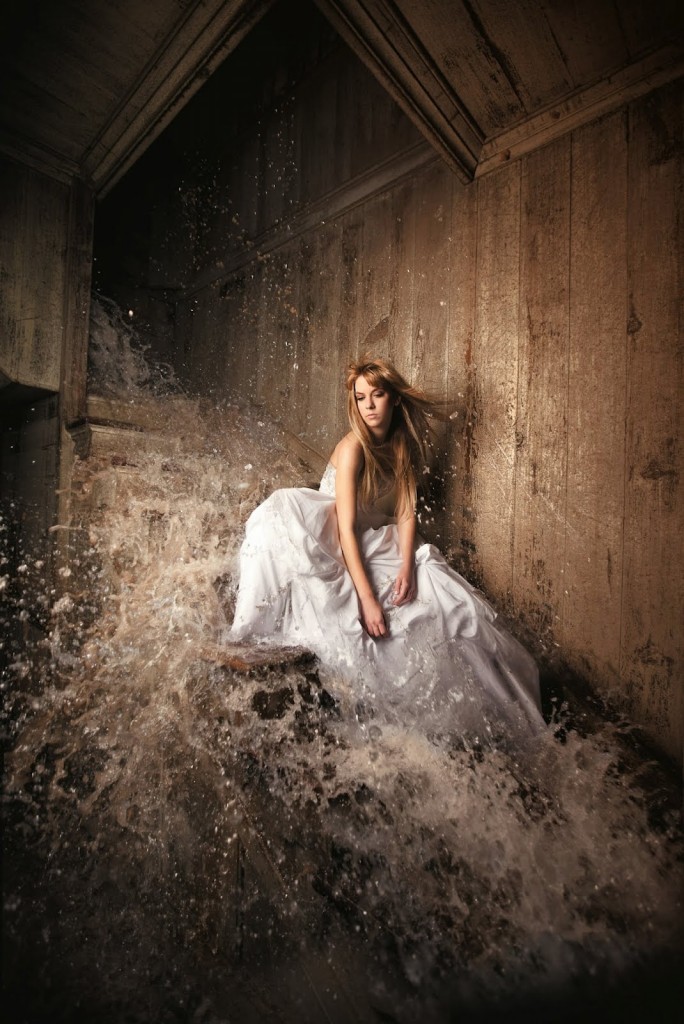
In the final shot, I used a large softbox, camera left, to light the scene. A fast shutter speed allowed the light from the outdoors to go to black. Doing this made the water and the subject the focal point of the image.
Adding Drama
The wide angle lens shows off the environment and pulls you into the image. It is as though the water really is rushing towards you. Just in case you are curious, minimal Photoshop was done to the final image—we really did pour hundreds of gallons of water down these steps.
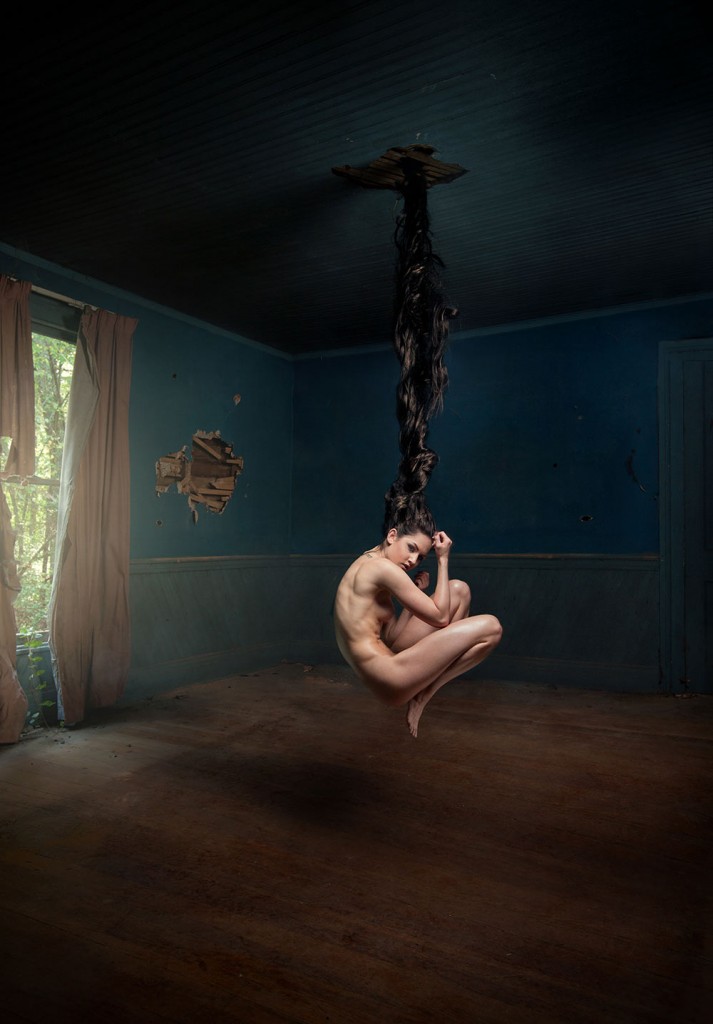
Floor to Ceiling
Using a wide angle lens will allow you to capture the floor and the ceiling of a small room at the same time. If you use this to your advantage, you can include a lot of great detail. One thing I have learned from shooting wide is that most ceilings are bare and boring. 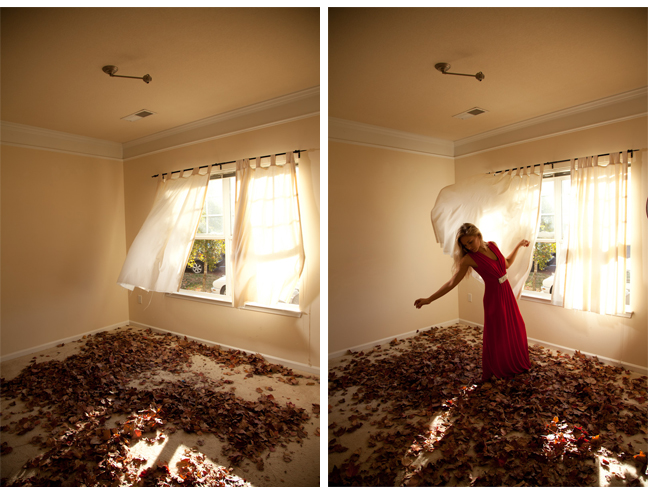 In order to avoid the lack of detail present in the ceiling, I added a flurry of leaves to the room. Two leaf blowers were used just outside of the room, stirring up a tornado and allowing leaves to go everywhere.
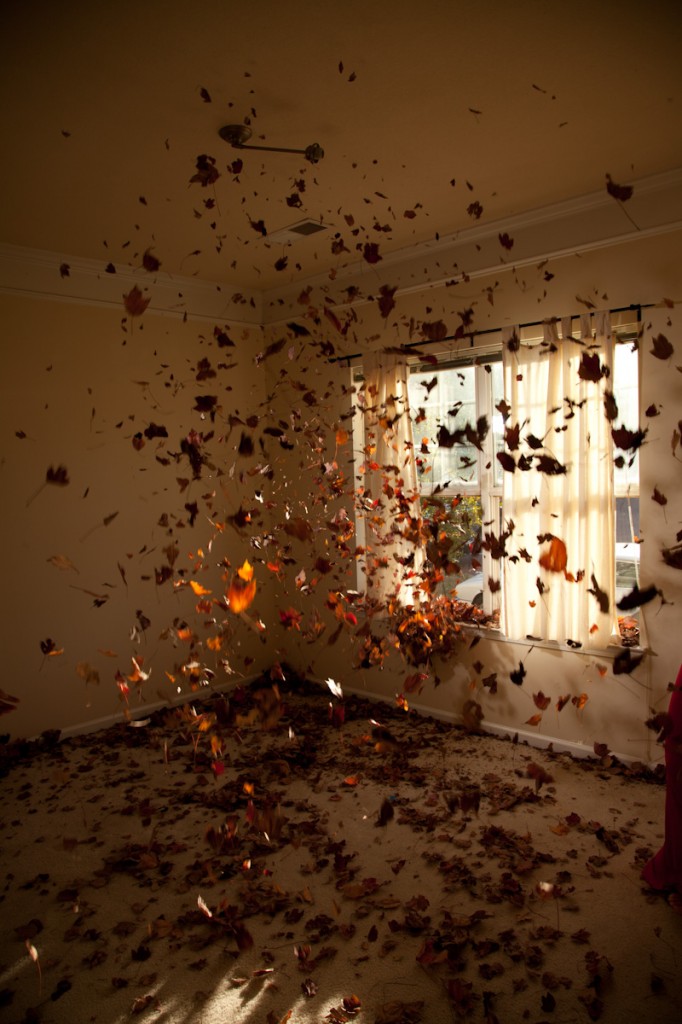
These shots were composited together with the final images of the model to create a dramatic photo with detail from floor to ceiling.
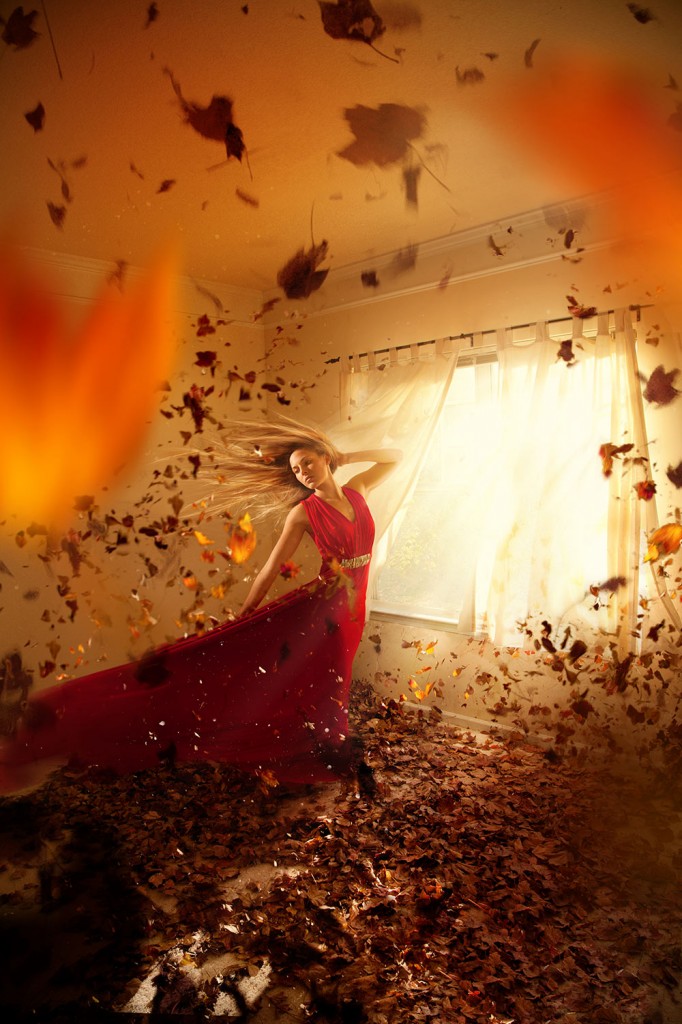
Converging Lines
Straight lines made by walls and ceilings will converge more dramatically when photographed with a wide angle lens. If you can, place your subject where these lines come together, and they will help to lead the viewer’s eyes straight to the subject.
Lighting
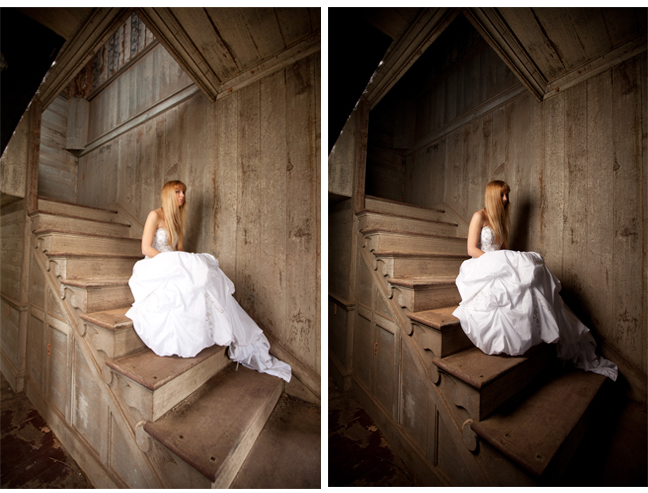
One problem many photographers face when shooting wide is getting too much in their scene. If you are using lighting such as a softbox or beauty dish, it may be very hard to keep this equipment out of the image. At the same time, not using lights may cause your image to be underexposed in key areas. 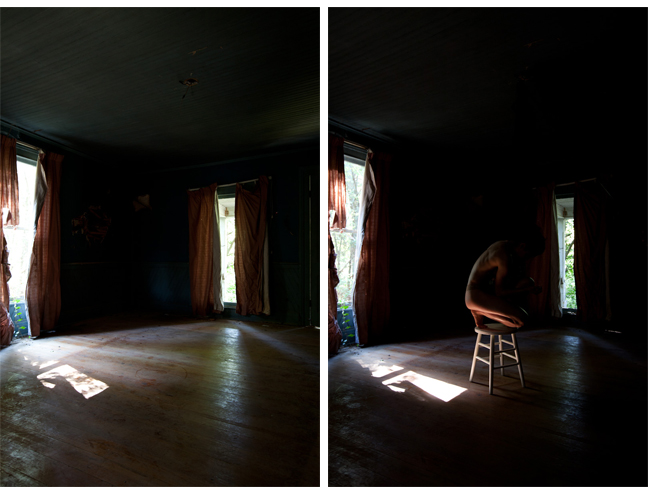 If you expose for the outdoors, the subject of this image would be dramatically underexposed. In order to expose both, a softbox was necessary.
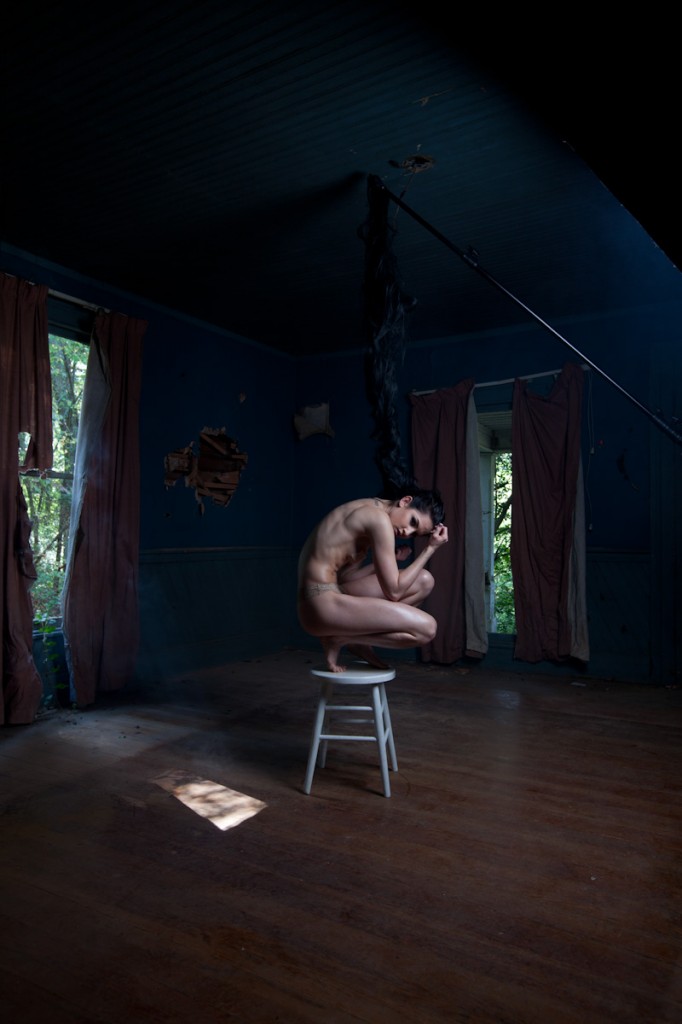
The subject and the background are now exposed well for the final image, but the softbox is visible to the viewer. This is where Photoshop comes in. If you do have to include lighting in the shot, be sure to take a photo in the same place with the lighting moved. Then you can simply replace that part of the image. As you can see, the final shot does not contain any of those elements, allowing the viewer to focus on the subject.
Center Your Subject
If you are shooting a person, be sure to keep them near the center of your frame when shooting with a wide angle lens. These lenses cause a bit of perspective distortion, and if your subject’s face is near the edges, it will come out looking like you printed their face on a fruit rollup and then pulled it apart.
—–
Thanks again, Aaron!
To learn more about photography, lighting, and how to Photoshop together images like these, check out Phlearn.com. They make five free videos a week and offer the most in-depth Photoshop tutorials on the internet. Pretty sweet deal if you ask us! 🙂


Hope you enjoyed!
Caroline Bishop
Lensrentals.com
June, 2012
Author: Caroline
-
Kevin Kirchner
-
JMMcInnes
-
JL Smith
-
Richard Harrington
-
Christian Holt
-
the.growler
-
Robert McArthur
-
John White
